Upload Retention
Retention on the Data Governance Tool can be added and updated in two ways,
- from the UI
- from the File Import feature.
This guide will demonstrate the steps required to add and update retentions using File Import feature and Deleting a Retention.
Adding and Updating Retention via File Import feature
Log in to Data Governance Tool
D:\Meru Data\GitHub Guide\MeruDocs\Media\Images\Help\Upload\Upload_Retention\Upload_Retention_Step_1.png
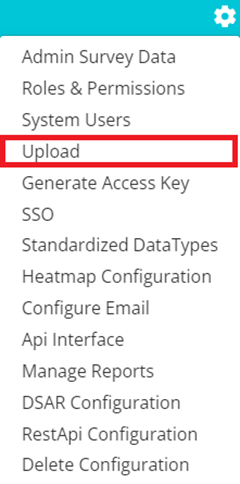
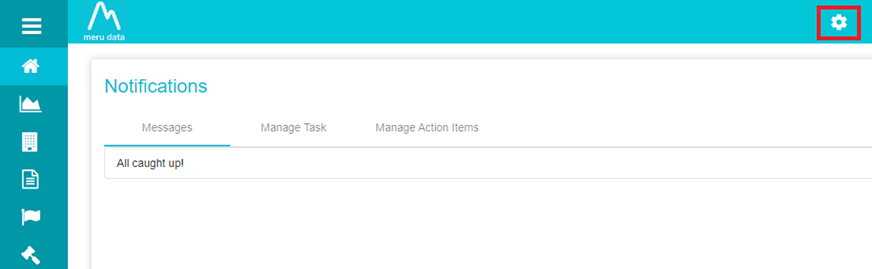
From the Main Screen of Data Governance Tool, click on
 present on the top right of the screen
 Click on Upload from the drop-down menu that appears
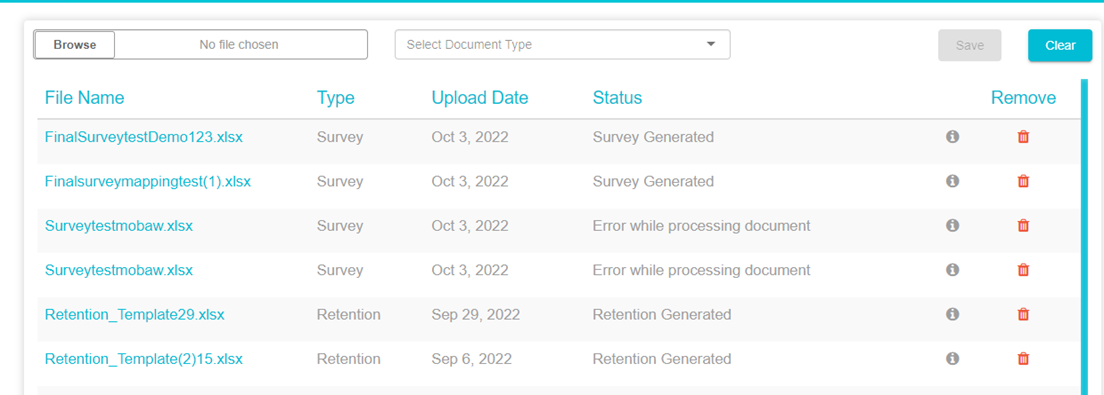
The uploads page of the Data Governance Tool will open
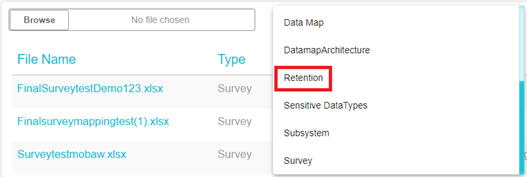
From the drop-down, select Retention as the document type
Click on

Here you can configure the columns to be included and their order

Click Save to save the changes and then click Export at the bottom right of the screen to save the Configuration as an XLSX file

Once saved, you can open the XLSX file on your local device and input the information as required
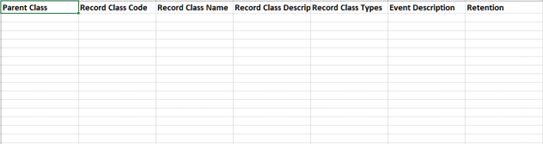
Note:
The following fields are mandatory, Parent Class, Record Class code, Record Class name, Record Class type
Should there be multiple values for the following fields, they can be separated with commas; Record Class Types, Business Function, Applicable Systems
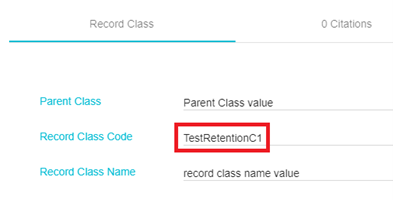
- To perform a Partial Update, you can enter the value into the field/s you want updated and delete all other fields.
Ensure to enter in the Record Class code of the retention you want updated on the spreadsheet. In other words, other than the Record Class code + the field/s with the values you wanted updated, all other fields can be deleted on the spreadsheet.

Note:
To update an existing retention via File Imports, Copy and Paste the Record Class Code, of the retention you want updated, on the spreadsheet.

The updates made on the via file imports will reflect on the existing retention once the file has been uploaded.
However, it is important to note that editing via the File Imports feature will override the existing field value, not append it
Note:
The following fields cannot be updated/edited using the File Import feature; Retention, Retention Formula, Created on.
New fields cannot be added using the File Import Feature
After the required information has been entered into the spreadsheet, save the XLSX file on your local device
On the uploads page on the Data Governance Tool, click on
 and select the saved XLSX file
 Once selected, click present on the right of the panel

The following message will appear

The document will first be displayed on the Upload page under the status: Uploaded

Once the web job runs (which occurs every 5 minutes) the status of the file will change to Report Generated

Click on Report Generated to view the Approval page for the Retention. Here you view the additions or updates made to the retention and approve the same by clicking the approve button at the bottom of the page.
In this example, the retention has been updated, hence Updates are highlighted. Should a new retention be created, New would be highlighted
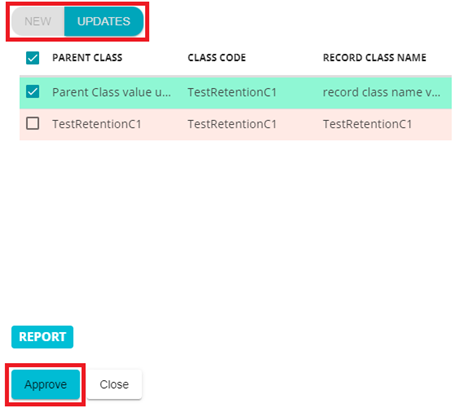
The status of the Retention will change to To be Approved

Once the web job has run, the status of the file will change to Retention Generated

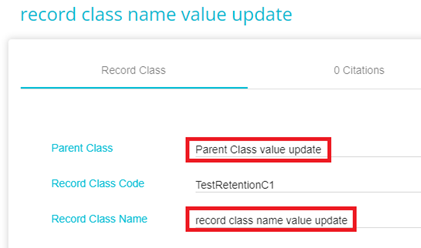
The updates will be reflected on the retention which can be accessed by
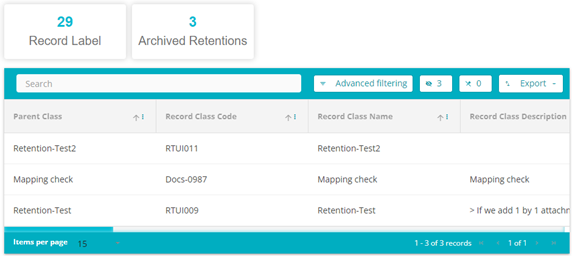
Going to the Retentions page
Clicking on Record Label
Locating the Retention on the Search bar
Deleting a Retention
To delete a Retention, look for that particular file using the Search Bar
Once you have located the file, use the horizontal scroll to scroll to the right until the Delete button is visible

On confirming that you want to delete the file, it will be moved to the Archive table present on the top of the page
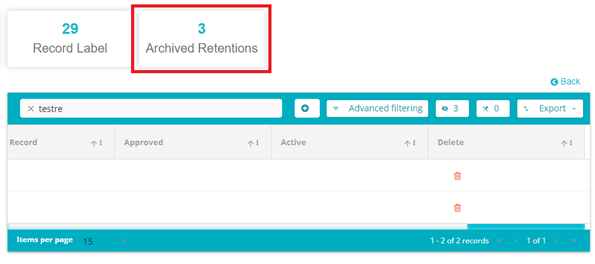
The file will remain under Archived Retentions for 2 years from the date of deletion until it is deleted automatically
The file can also be unarchived by clicking the Undo button

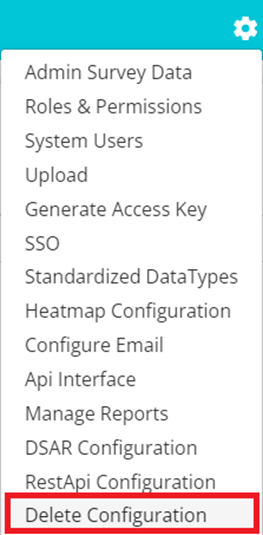
Conditions to autodelete Archived retentions can also be set. To do so, follow the given steps
- From the Main Screen of Data Governance Tool, click on
 present on the top right of the screen
- From the drop-down menu that appears, click on Delete Configuration
On the Delete Configuration page, you can specify the years in which the archived retentions will be auto-deleted.
Click the
 button present on the right of the panel to save the changes.